
How many previous owners is too many for a used car?
One previous owner sounds like a green flag. It rarely tells you much. Here's what used car previous owners actually reveal — and what to ask instead.

When most people think of a clean car, they think of shiny paint. But any expert detailer will tell you that the secret to a truly stunning vehicle lies in the details. Specifically, the exterior car trim.
Over time, the plastic, rubber, and vinyl components around your windows, bumpers, and wheel wells can become "chalky" or faded due to sun exposure. At Carma, we believe exterior car detailing is the best way to preserve your car’s value and aesthetic. This guide will walk you through how to clean, restore, and protect your trim to keep it looking brand new.
The exterior car trim refers to the non-painted accents of your vehicle. This includes:
These materials are porous and sensitive. Unlike your car's paint, which has a clear coat for protection, trim is often "naked" and highly susceptible to UV degradation, causing it to turn from deep black to a dull grey.
While a professional detailer does a great job, learning to detail your exterior trim yourself has major perks:
1. Cost savings: You avoid high labour costs and only pay for the products, which last for dozens of applications.
2. Longevity: Regular maintenance prevents the plastic from becoming brittle and cracking, which can lead to expensive leaks in window and door seals.
3. Resale value: A car with deep black trim and clear headlights always fetches a higher price than one that looks weathered.
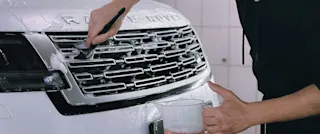
1. Debris removal and prep
Start by using a vacuum or a blower to remove leaves and twigs from the base of the windscreen and the wheel wells. Use a wax remover on a microfibre cloth to wipe down plastic trim pieces. This removes old polish residue like those annoying white streaks that soap alone won't touch.
2. Inspect your components
Before getting wet, check your windscreen wiper blades. If they are cracked or leaving streaks, they should be replaced. You should also inspect your headlights; if they are cloudy, they may need a specific headlight restoration polish.
3. The two bucket wash method
To prevent scratching your paint, use the two-bucket method. Fill one bucket with soapy water and the other with plain water.
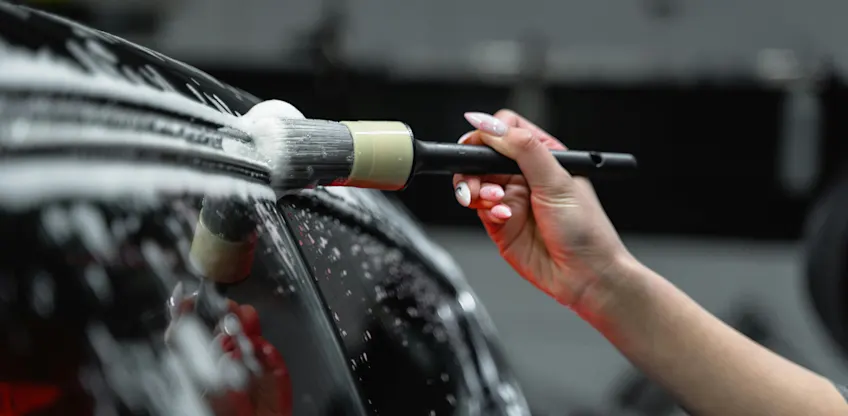
4. Deep clean with a clay bar
After washing, your trim and glass might still feel "bumpy." Follow our guide on how to use a clay bar to pull out microscopic contaminants like industrial fallout and tree sap. This creates a perfectly smooth surface for your protectant to bond to.
5. Drying
Never let your car air dry! This causes water spots to form. Use a large, clean microfibre towel to pat the car dry, paying close attention to the window seals where water likes to hide.
6. Restore and protect
Once the trim is dry, apply your trim protectant.
One previous owner sounds like a green flag. It rarely tells you much. Here's what used car previous owners actually reveal — and what to ask instead.

What happens if you buy a car with finance owing? The lender can repossess it from you even if you paid in good faith. Here's how to protect yourself.
Should you buy a diesel car in Australia? The honest answer depends on how you drive. Here's when diesel makes sense — and when it doesn't.