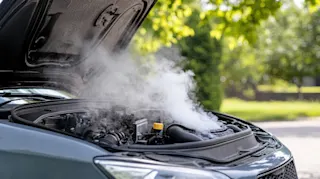
What to do when your car overheats
Car overheating? Learn why it happens, what to do (and avoid), and follow our step-by-step guide to stay safe and prevent engine damage.

Replacing the cabin air filter is one of the many simple car maintenance jobs that you can do yourself with just a few tools and a little know-how. So what does a cabin air filter do? It’s an important component in your car’s heating and cooling system that filters out contaminants in the air, keeping the air inside your vehicle clean and free from dust, pollen, and other pollutants. It doesn’t last forever, so regularly replacing the filter is essential for clean air inside your car. First, let’s go through a few important bits of car maintenance knowledge before jumping into our guide.
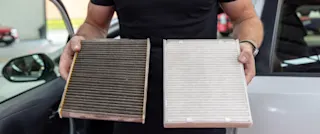
A cabin air filter traps dust, pollen, allergens, and other airborne particles inside your car. Over time, the filter can become clogged, reducing its effectiveness and potentially impacting your comfort and respiratory health. By replacing the filter regularly, you ensure that the air circulating in your car's interior remains clean and healthy for your comfort.
From a mechanical perspective, a clogged or dirty cabin air filter can strain your car's heating, ventilation, and air conditioning (HVAC) system. Proper airflow through the HVAC system is also essential for effective defogging and defrosting of your car's windows. When your cabin air filter is clogged, It reduces airflow, decreases system efficiency, and may lead to overheating or premature wear on HVAC components. By staying proactive with maintenance, you can extend the life of your car's interior components and avoid unwanted surprises down the line.
How often you should be changing your cabin air filter can depend on your driving conditions, but a general rule-of-thumb is replacing every 10,000-15,000 km. If you drive off-road on dirt or gravel roads where the air filter is working harder, you might want to change it sooner.

Check your owner’s manual for the right kind of cabin filter to buy. Once you have the right model, you can pick from basic filters for dust and pollen, or something more advanced to capture even more pollutants such as bacteria and viruses.

Depending on the car model, the cabin air filter is usually located behind the glovebox or under the dashboard on the passenger side of the vehicle. You’ll need to pop the cover off and the cabin filter should be free to take out. Look for any clips, screws, or latches securing the glovebox and remove them as needed to access the filter. If it’s not immediately apparent, best to check your owner’s manual for the exact location and how to access it.
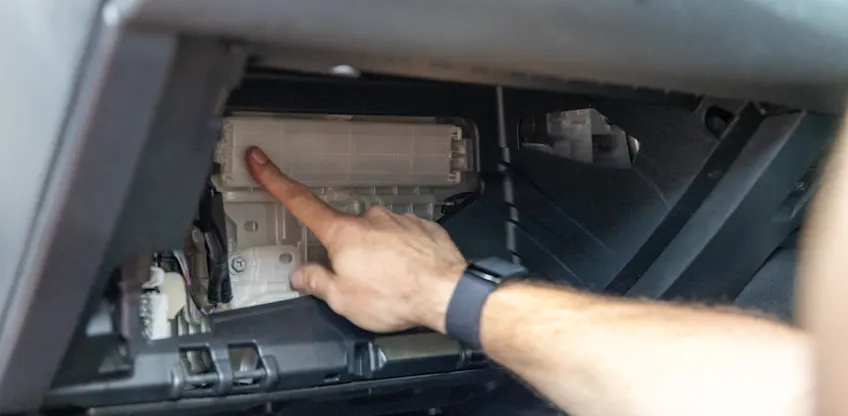
Once you've located the filter, carefully pull it out from its housing. While you’re at it, use a vacuum or damp microfibre cloth to remove any debris or dirt buildup in the housing. Make sure the housing is all clean before installing the new filter.
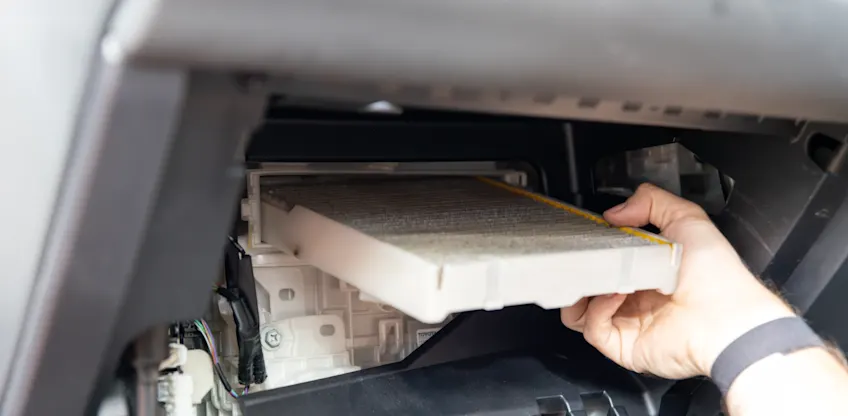
Insert the new cabin air filter into the housing, making sure it's oriented correctly according to the airflow direction indicated on the filter. The filter should fit snugly into place without any gaps or bending.
Hot tip: Pop an air freshener in there to keep your cabin air smelling fresh and clean!
Once the new filter is installed, reassemble the glovebox by reversing the steps you took to access it. Make sure any clips, screws, or latches are securely fastened.
Start your vehicle and turn on the air conditioning or heating to ensure proper airflow through the new filter. Check for any unusual noises or smells that could indicate a problem with the installation.
If everything checks out, you’re all done. We recommend making a note of the date and odometer reading for future reference on when to replace it again. Want more car tips and tricks? We’ve got a guide for washing your car and all you need to know about jump starting a car with a flat battery.
Car overheating? Learn why it happens, what to do (and avoid), and follow our step-by-step guide to stay safe and prevent engine damage.

How much could I sell my car for? See how fair wear and tear impacts your car’s value, from tyres to paint, and how to keep it in top condition.
Stay safe on the road with these essential monthly car maintenance checks. From engine oil to tyre pressure, learn how to keep your car running smoothly and avoid costly repairs.